Guys, what happens if we send a balloon into the stratosphere ?
- Ptimulus 1
- Regulation
- Links
- Thanks
- Contact
- Github
© 2025. All rights reserved.

Guys, what happens if we send a balloon into the stratosphere ?
© 2025. All rights reserved.
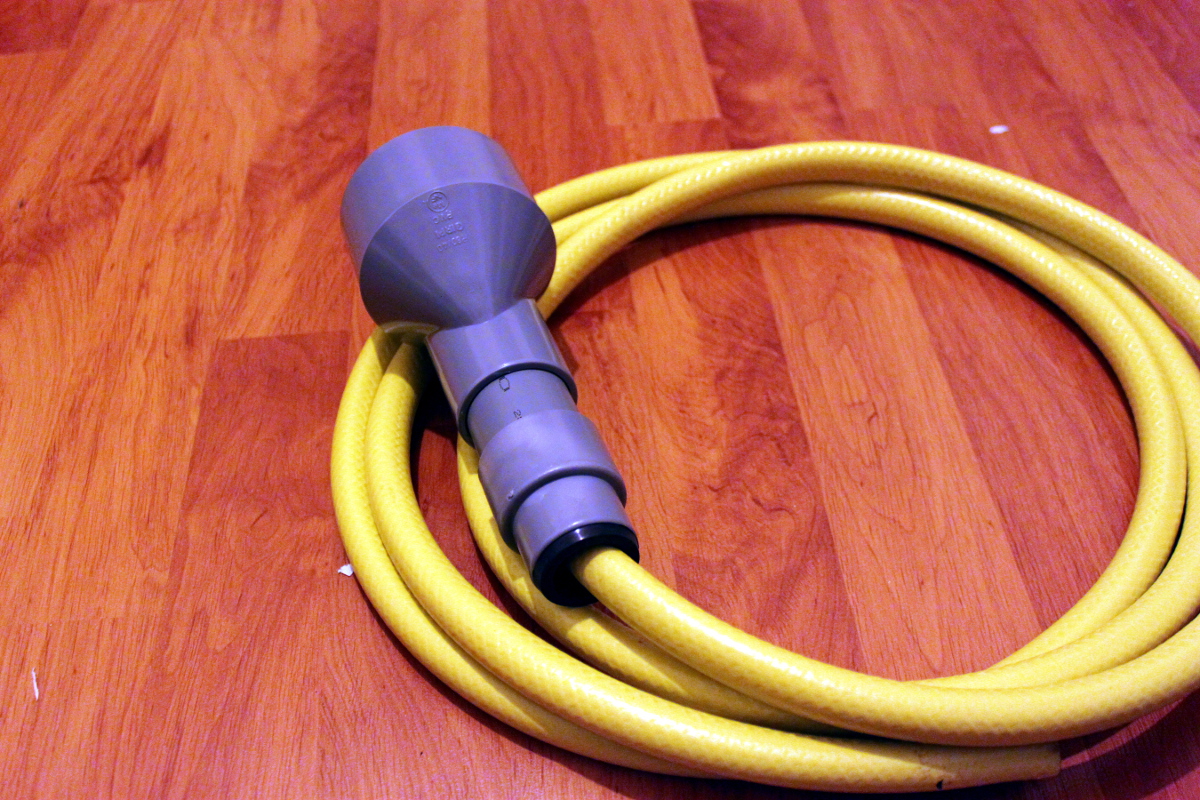
We bought the balloon and parachute on the specialized site randomengineering. We just had to wait for the design of other flight chain elements to be well underway to properly size the balloon and parachute. For the helium, we contacted the nearest Air Liquide dealer, who explained us the purchasing process and who even graciously lent us the regulator to inflate the balloon.

We had to build a device to connect the balloon to the regulator: the regulator was 1.5cm in diameter while the neck of the balloon was 11cm in diameter. Thus was born Jack, beautiful adaptor of our design for inflating a balloon with a 11cm neck with a 1.5cm regulator, made using a garden hose and PVC pipe, glued with expanded foam:
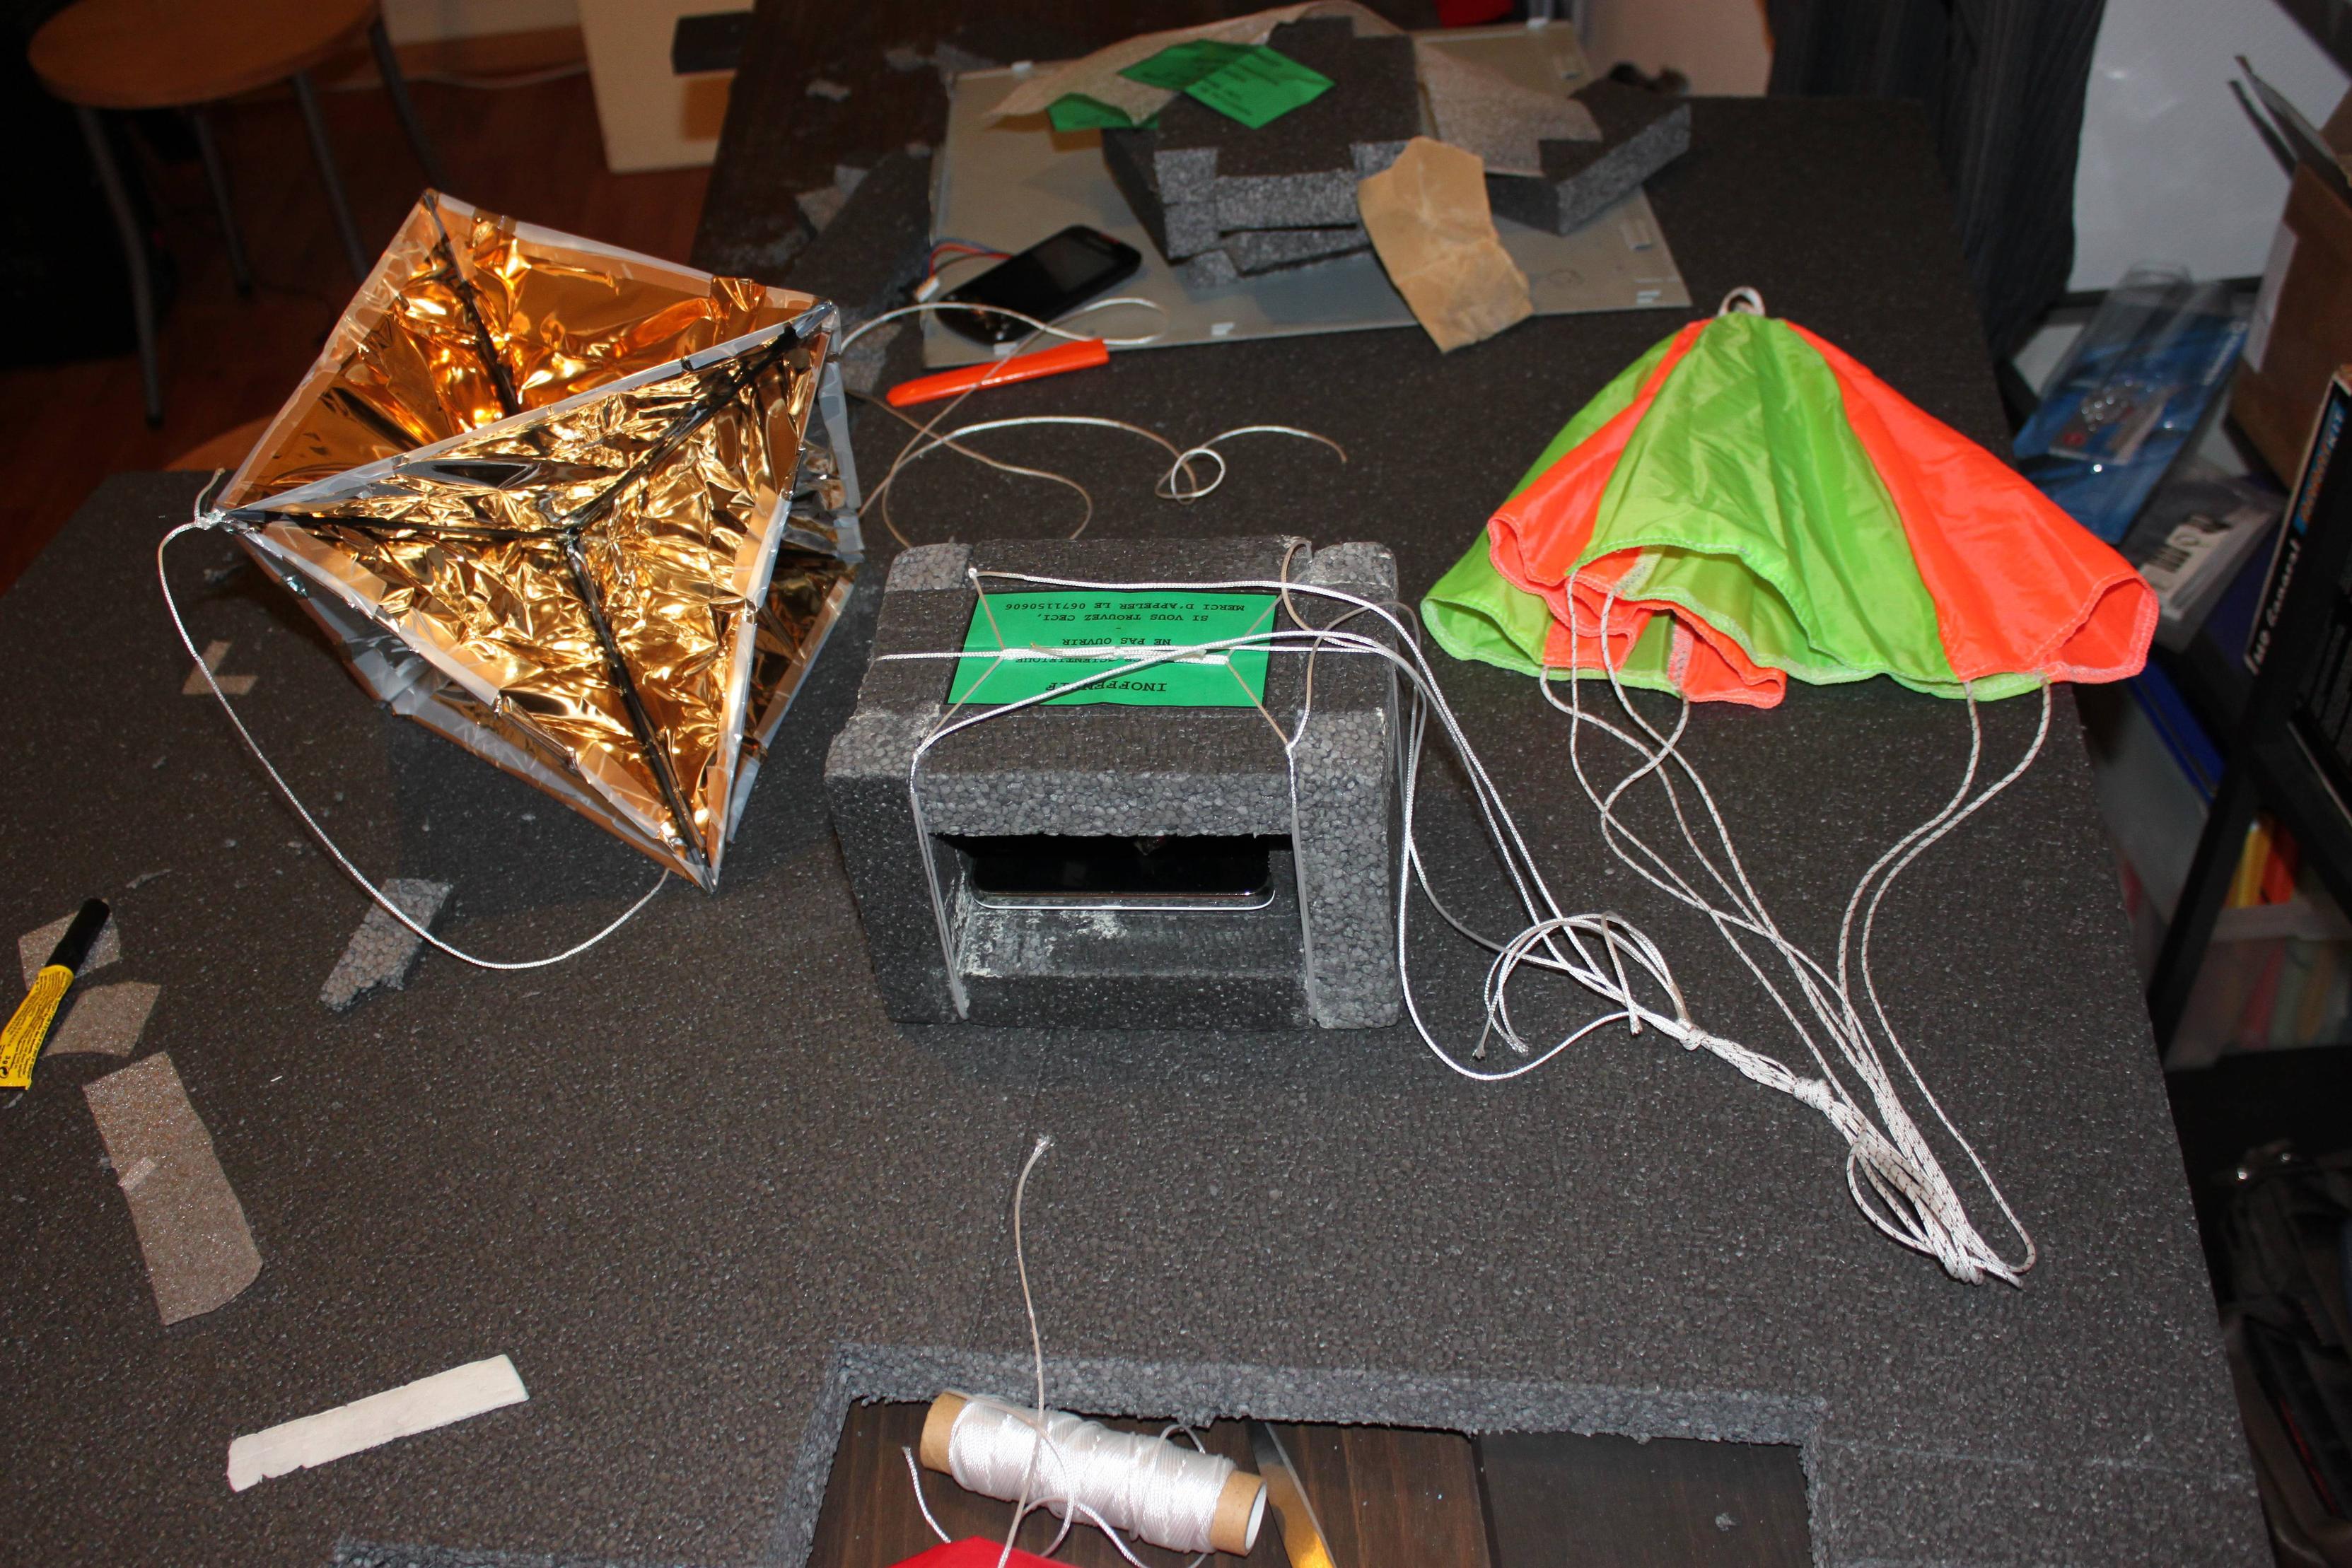
The presence of a radar reflector is compulsory for flight permission of the DGAC (French flight regulator). This is an equipment that we could build ourselves by following existing radar reflectors measurement.
The construction of the payload was very challenging. The constraint we had were strong:
For the construction of the capsule, we decided to use expanded polystyrene. This is a material used in thermal insulation of houses and has the advantage of being easily available in DIY store. To find out which polystyrene to use and how thick we did some tests. We selected two different polystyrene which, on paper, seemed to have the best efficiency-weight ratio, and we built a capsule with each. We had a very light 1.5cm thick white polystyrene and a denser black 3cm thick one.

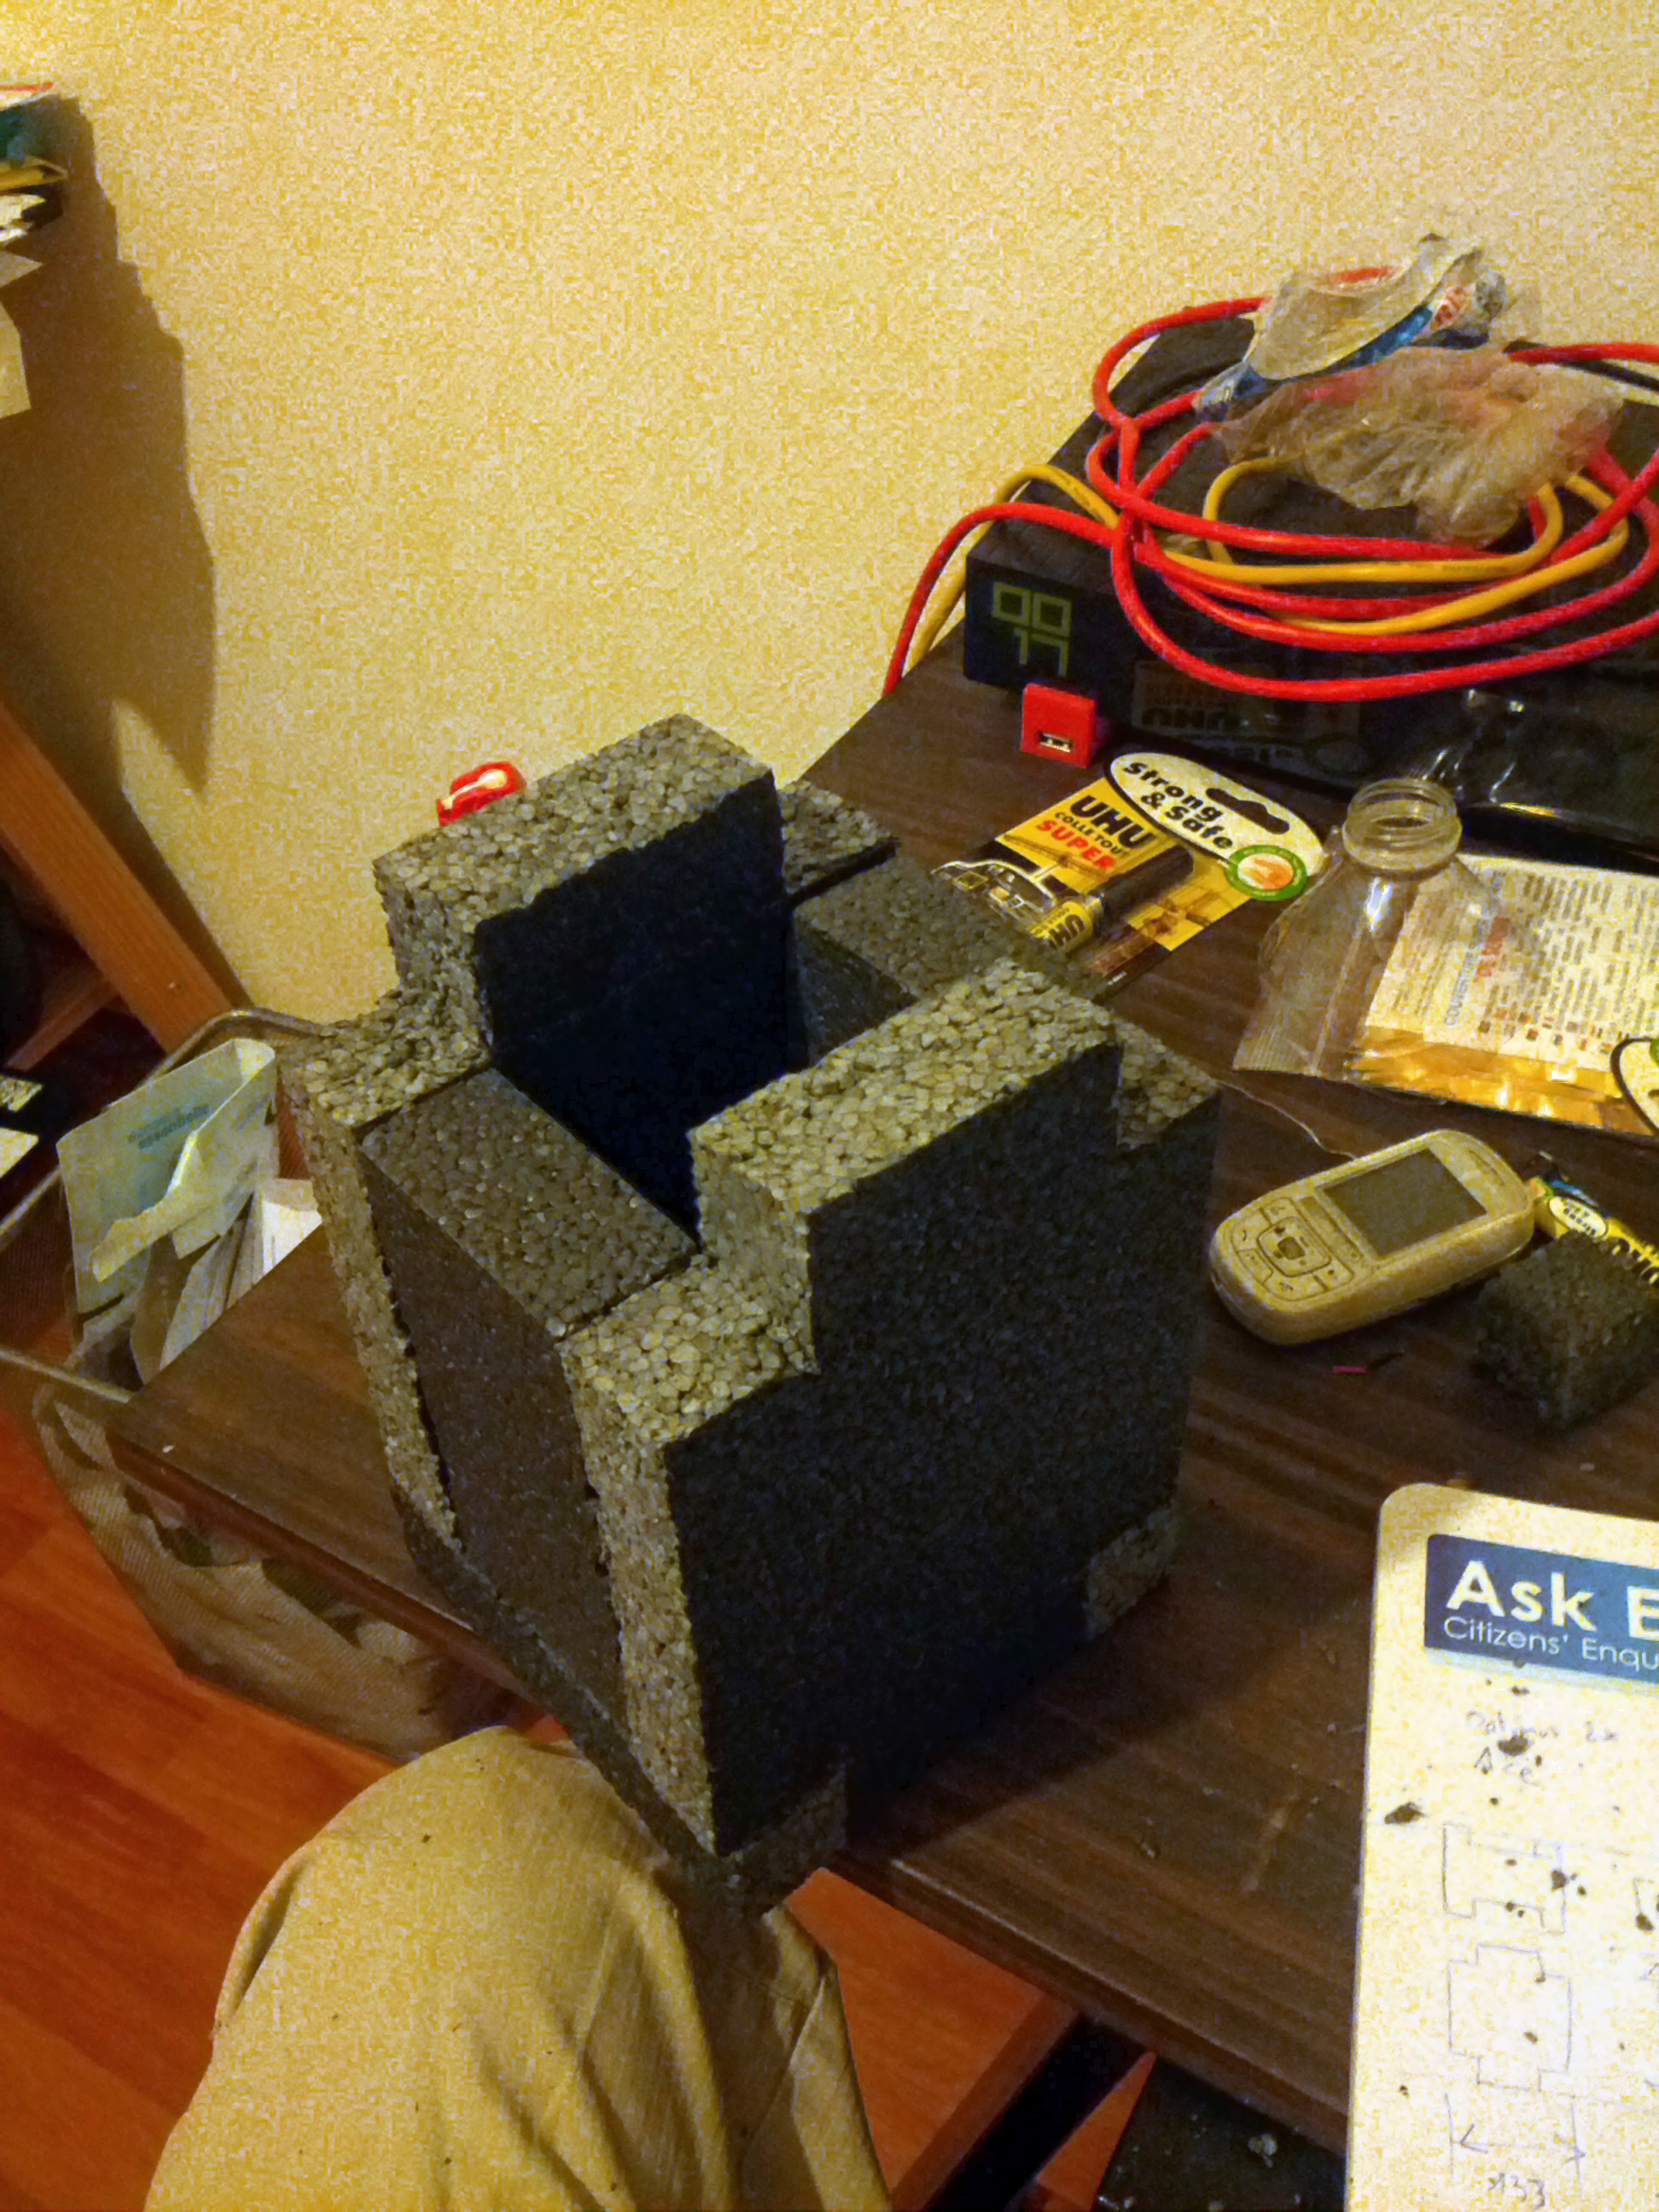
To test the thermal insulation of the two capsule, we tested them in a freezer (!) following the evolution of the internal temperature over time through a USB temperature sensor. The cell phones were inside the capsule and powered to to be closer than the real conditions: as any electrical equipment, a cell phone produce heat, which helps maintain the temperature inside the capsule.
The result was quite disappointing with the two capsule: the temperature remained positive only 30min in both cases, while the freezer was at a temperature of -18°C. This was clearly not enough for a 2h30 flight when the outside temperature drops below -50°C.
We choose to add in the payload a 8ohms resistor directly plugged on an auxiliary 1500mAh 3.7V battery (a cell phone battery) to produce heat inside the capsule. According to the fundamental electrical laws, our resistance would release 1,7W of heat for 3 hours. In practice, the auxiliary battery lasted only 1h40, but the temperature of the second capsule was stabilized at 15°C during this time, and remained positive during 2h15. It was quite sufficient, the flight was expected to last about 2h30 total, but the actual outside temperature would be higher at the beginning and at the end of the flight. In addition, with the decrease of the pressure due to the altitude, there is less heat loss by conduction.
The auxiliary battery and the resistor added an additional weight of about 40g, but we were still under our goal, and we had no choice anyway.
Here are the results of the tests of the 2 capsules in the freezer:
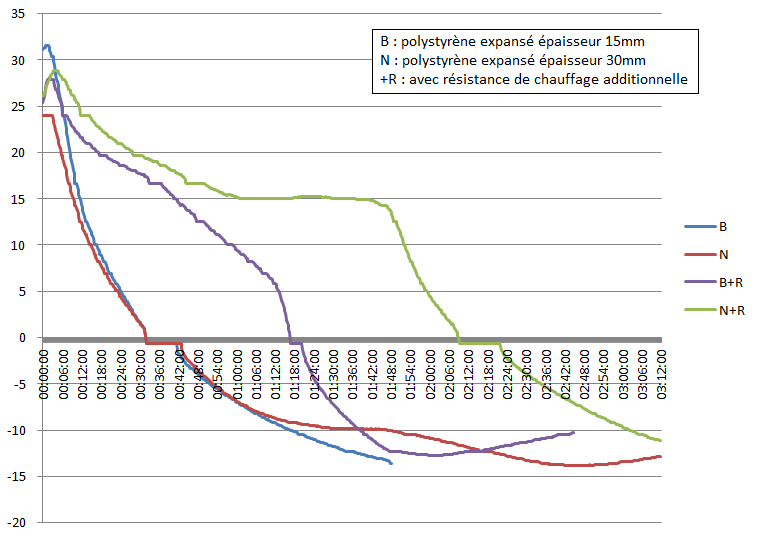 Test of the two capsules in the freezer
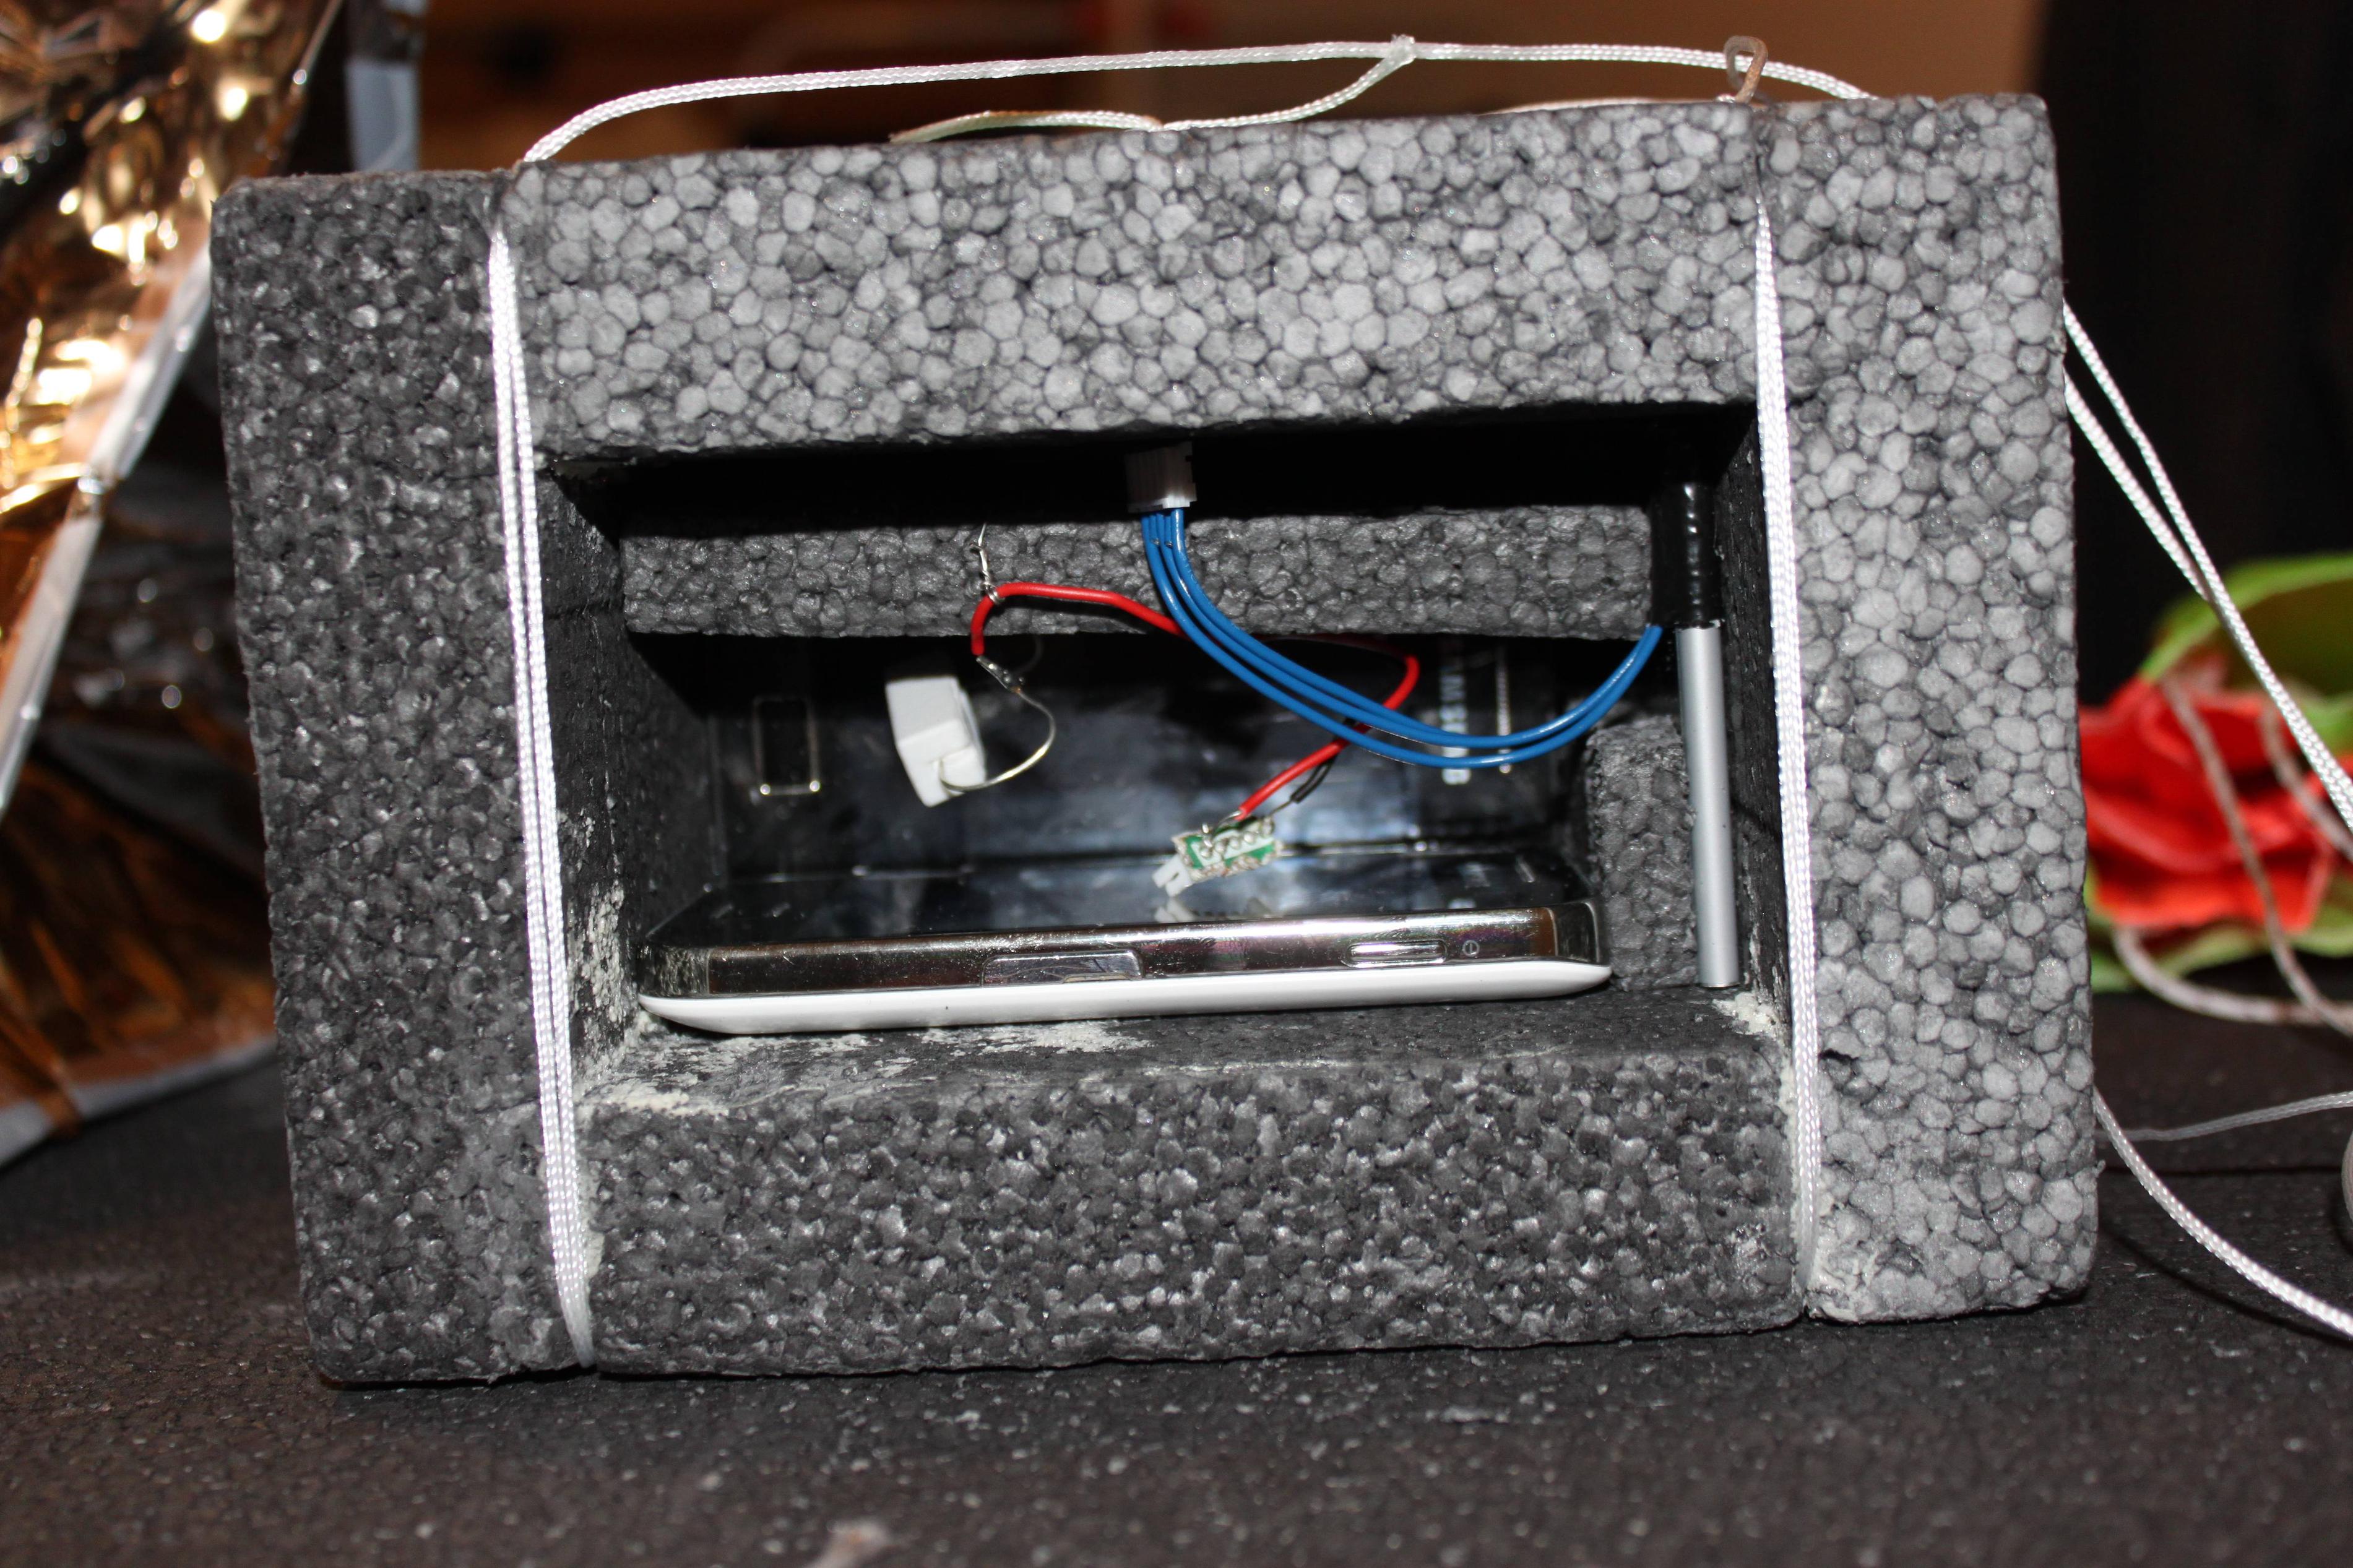
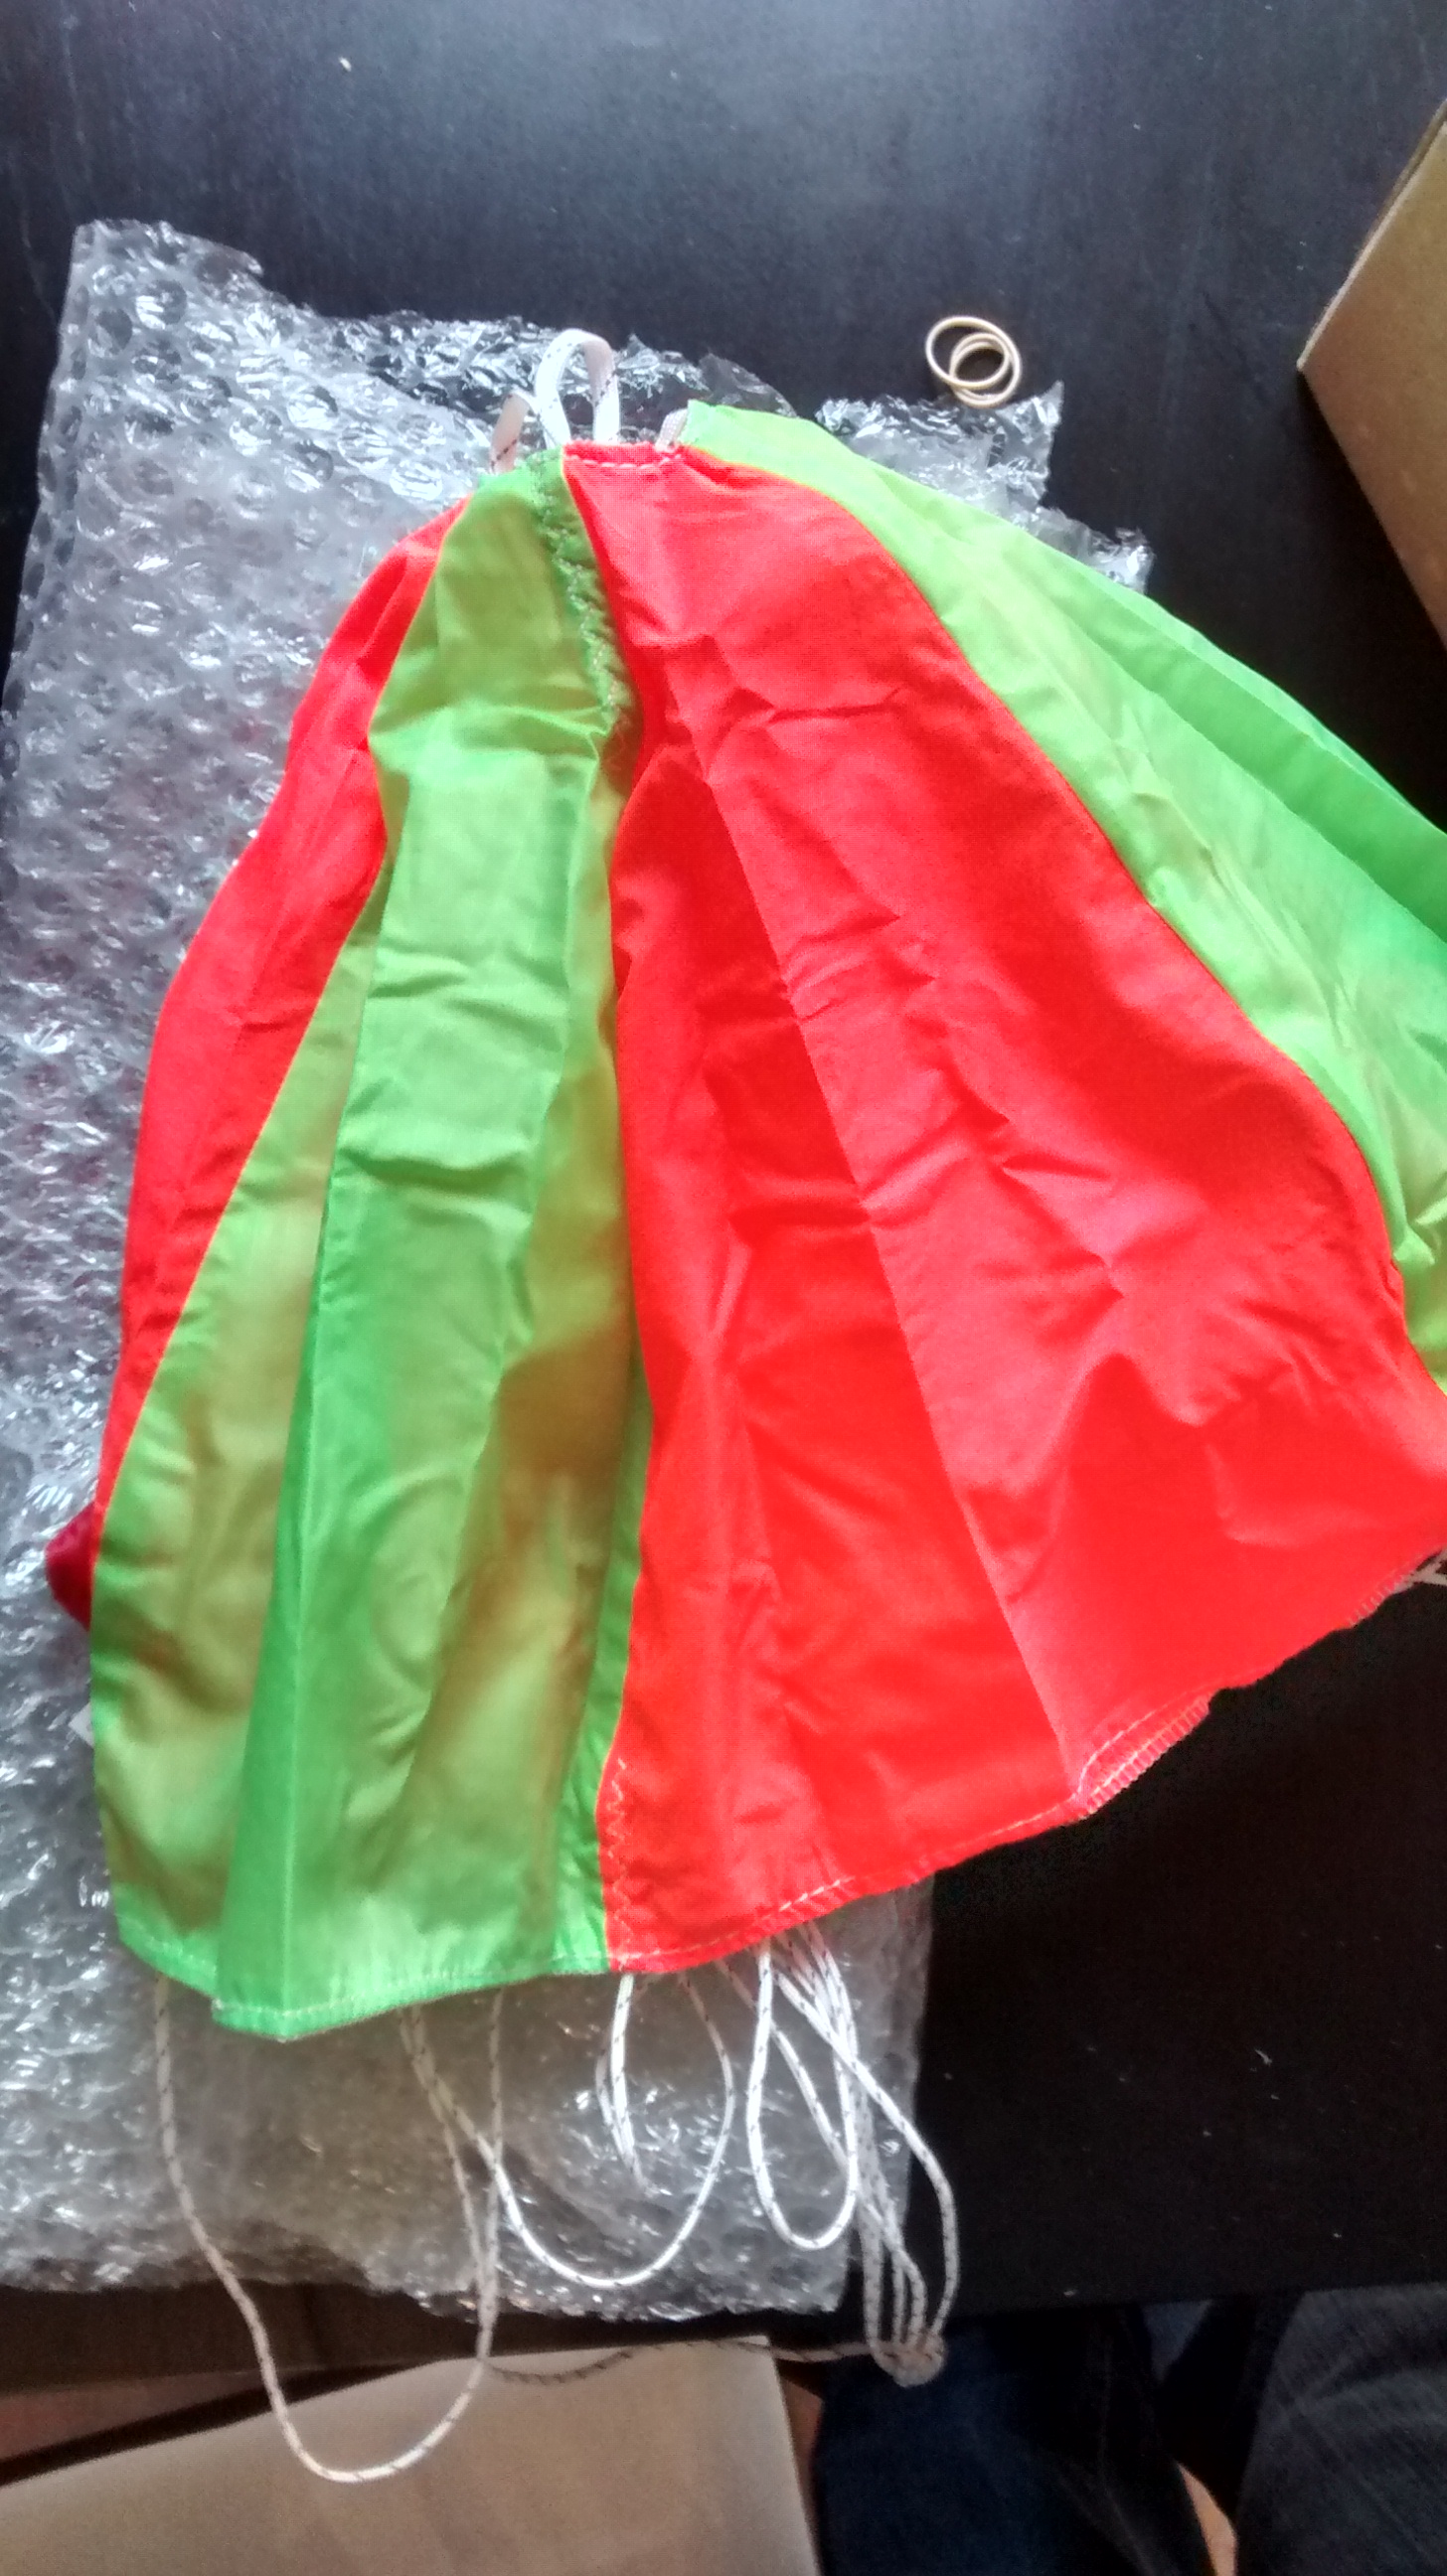
Here are 2 pictures of the completed payload. On the first one you can distinguish the two phones against the back and bottom, the auxiliary battery to the right and the “sugar” resistor in the center. The second photo shows the payload with our contact information printed on green background (in case someone finds it!), the parachute and the radar reflector.